Sharp Vision web-based user interface allows you to change Wi-Fi password, Network Name (SSID), and default router settings at http://192.168.1.1.
How to login to Sharp Vision router?
- Open a browser and type http://192.168.1.1 in the address bar.
- Enter the Username and Password and click Login.
- You will be logged in to the Sharp Vision router settings.
Note: The IP address, Username, and Password are printed on a sticker on the back of the router.
Default Sharp Vision Username and Password
| Router Model | IP Address | Username | Password |
|---|---|---|---|
| AS 342 DX | 192.168.1.1 | user | user |
| AS 121 W | 192.168.101.1 | adminisp | adminisp |
| AS 341 WT | 192.168.1.1 | admin | stdONU101 |
| AS 351 WT | 192.168.1.1 | admin | stdONU101 |
| AS 344 | 192.168.1.1 | admin | stdONU101 |
| AS 354 | 192.168.1.1 | admin | stdONU101 |
| AS 321 | 192.168.1.1 | adminisp | adminisp |
| AS 341 | 192.168.1.1 | adminisp | adminisp |
How to change Sharp Vision Wi-Fi Password and Network Name?
Select your router:
AS 342 DX
- Open a browser and type http://192.168.1.1 in the address bar.
- Enter the UserName: user and Password: user and click Login.
- Select WLAN > Basic Settings.
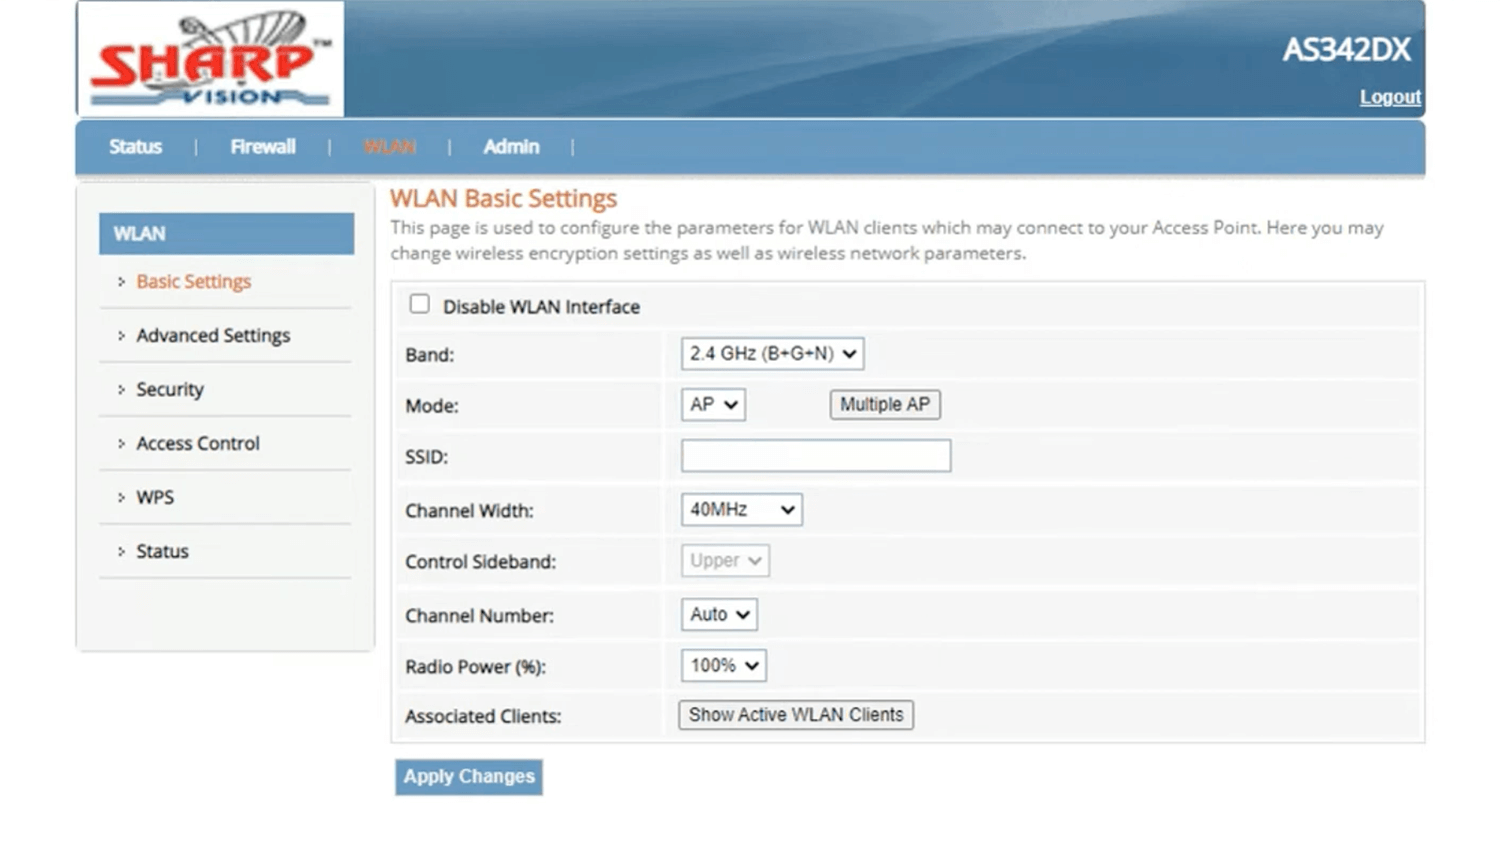
- Enter the Wi-Fi Network Name in the SSID field and click Apply Changes.
- Select WLAN > Security.
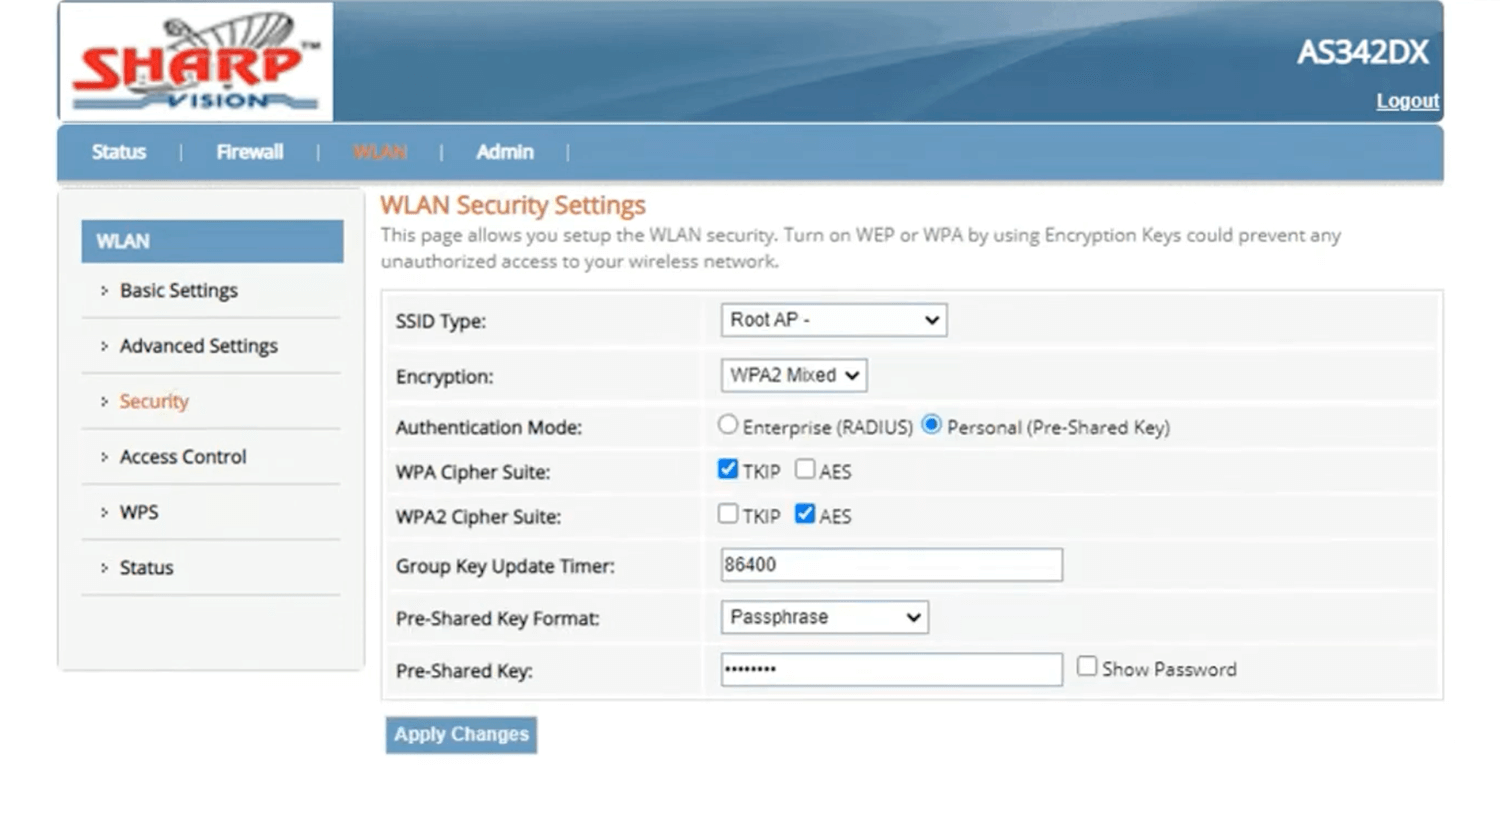
- Enter the Wi-Fi Password in the Pre-Shared Key field and click Apply Changes.
AS 121 W
- Open a browser and type http://192.168.101.1 in the address bar.
- Enter the UserName: adminisp and PassWord: adminisp and click Login.
- Select Internet > WLAN Config.
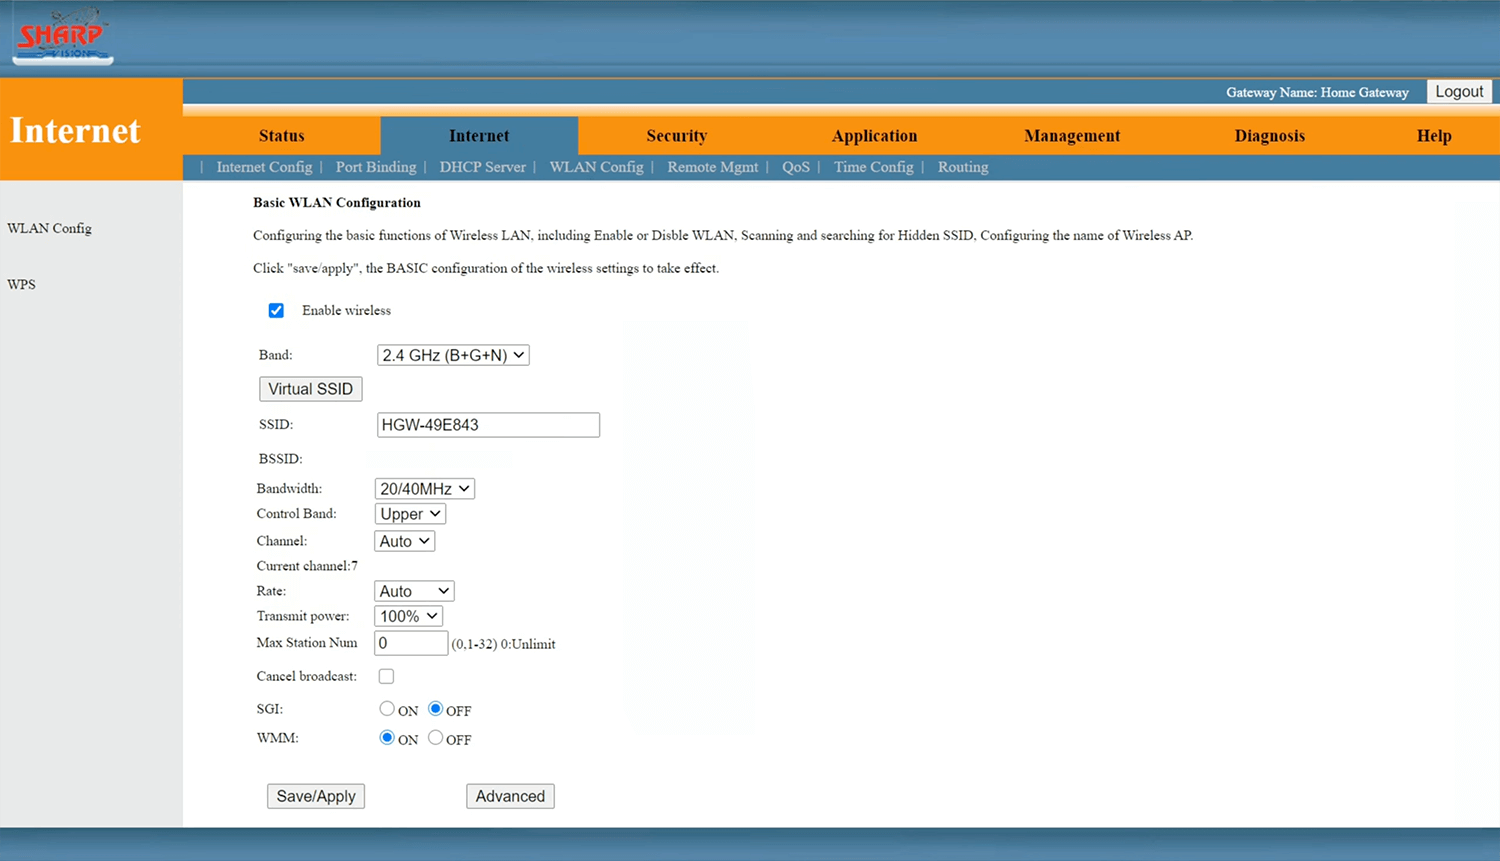
- Enter the Wi-Fi Network Name in the SSID field and click Save/Apply.
- Select Internet > WLAN Config > Advanced.
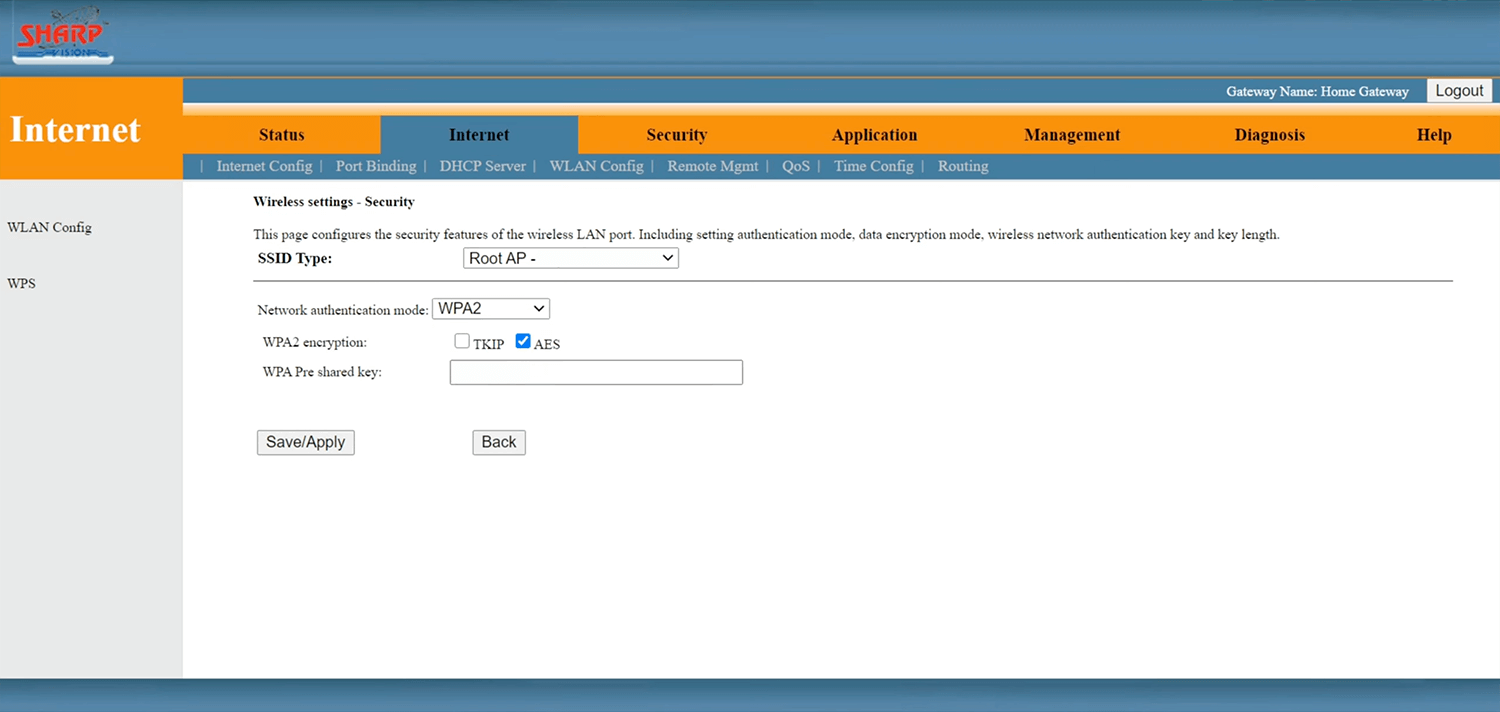
- Enter the Wi-Fi Password in the WPA Pre shared key field and click Save/Apply.
AS 341 WT
- Open a browser and type http://192.168.1.1 in the address bar.
- Enter the Username: admin and Password: stdONU101 and click Login.
- Select Network > WLAN > WLAN Basic.
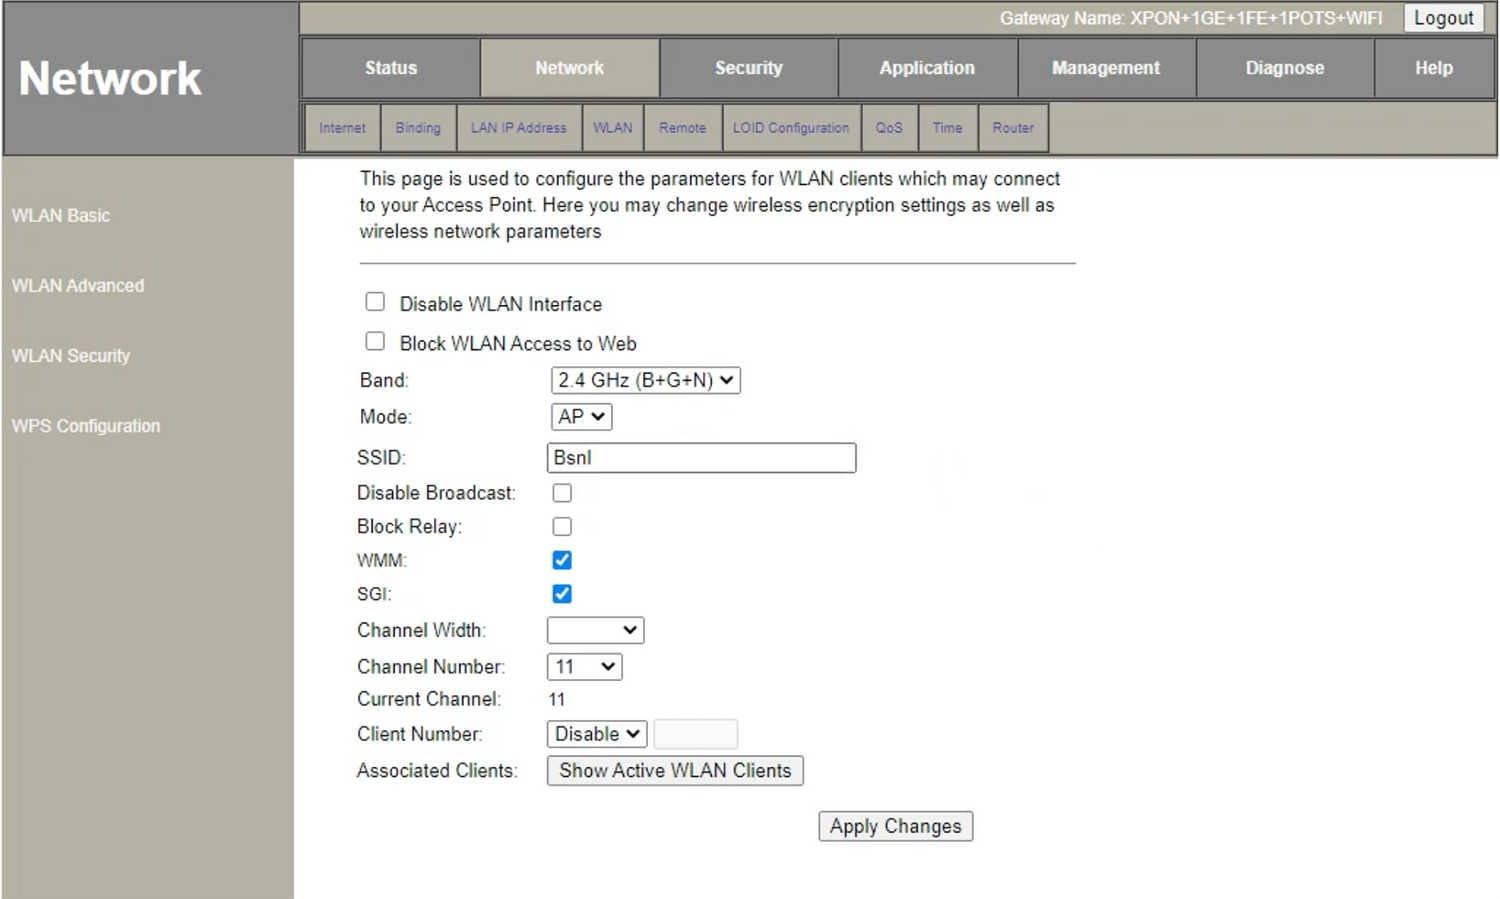
- Enter the Wi-Fi Network Name in the SSID field and click Apply Changes.
- Select Network > WLAN > WLAN Security.
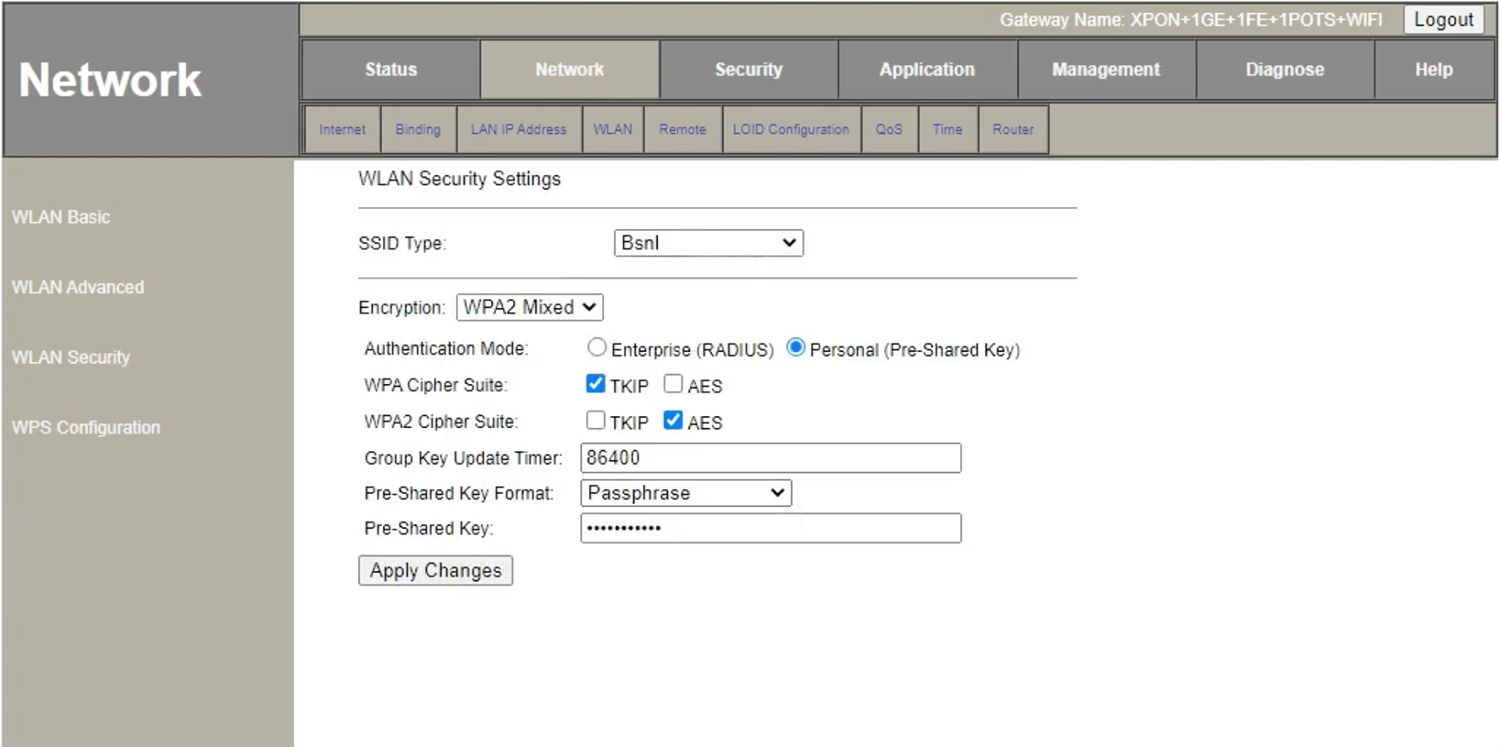
- Enter the Wi-Fi Password in the Pre-Shared Key field and click Apply Changes.
AS 351 WT
- Open a browser and type http://192.168.1.1 in the address bar.
- Enter the Username: admin and Password: stdONU101 and click Login.
- Select Network > 2.4G or 5G > WLAN Basic.
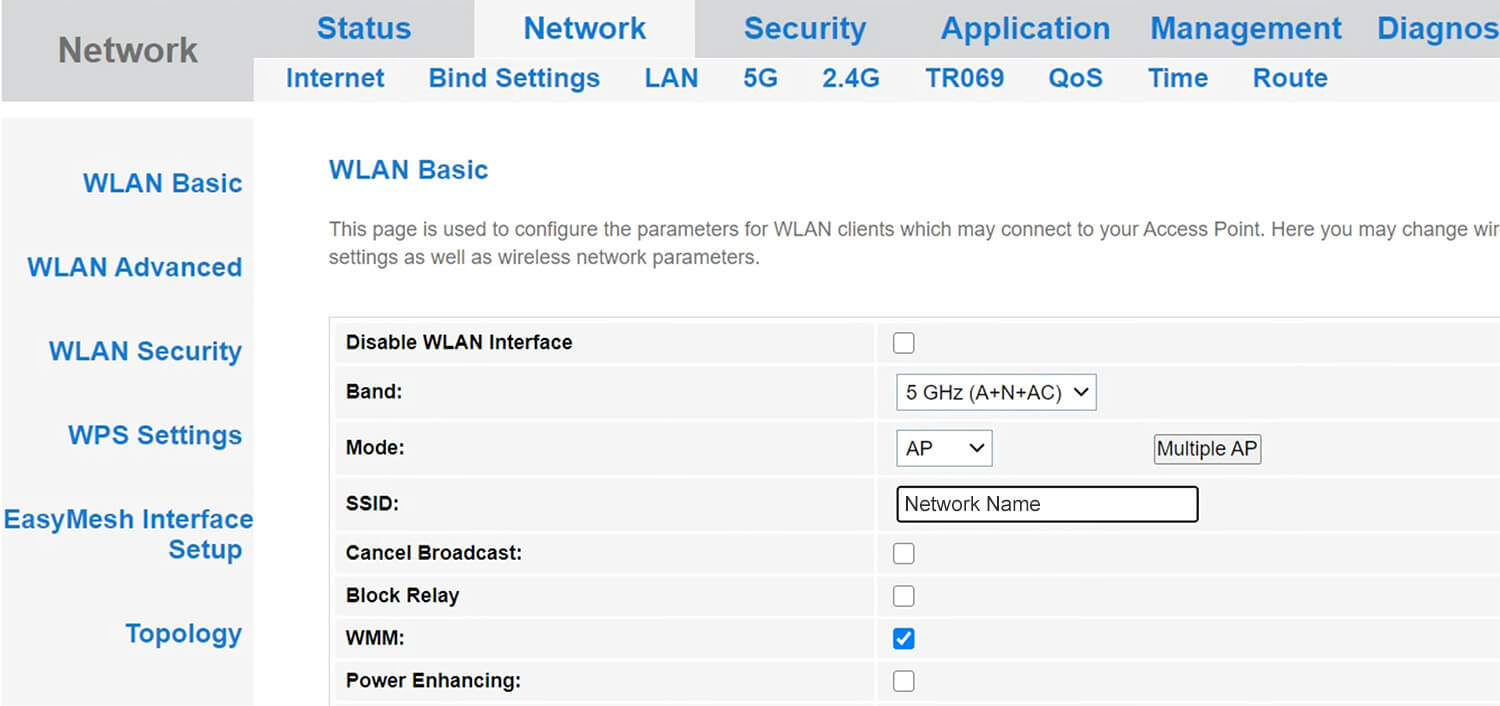
- Enter the Wi-Fi Network Name in the SSID field and click Apply Changes.
- Select Network >2.4G or 5G > WLAN Security.
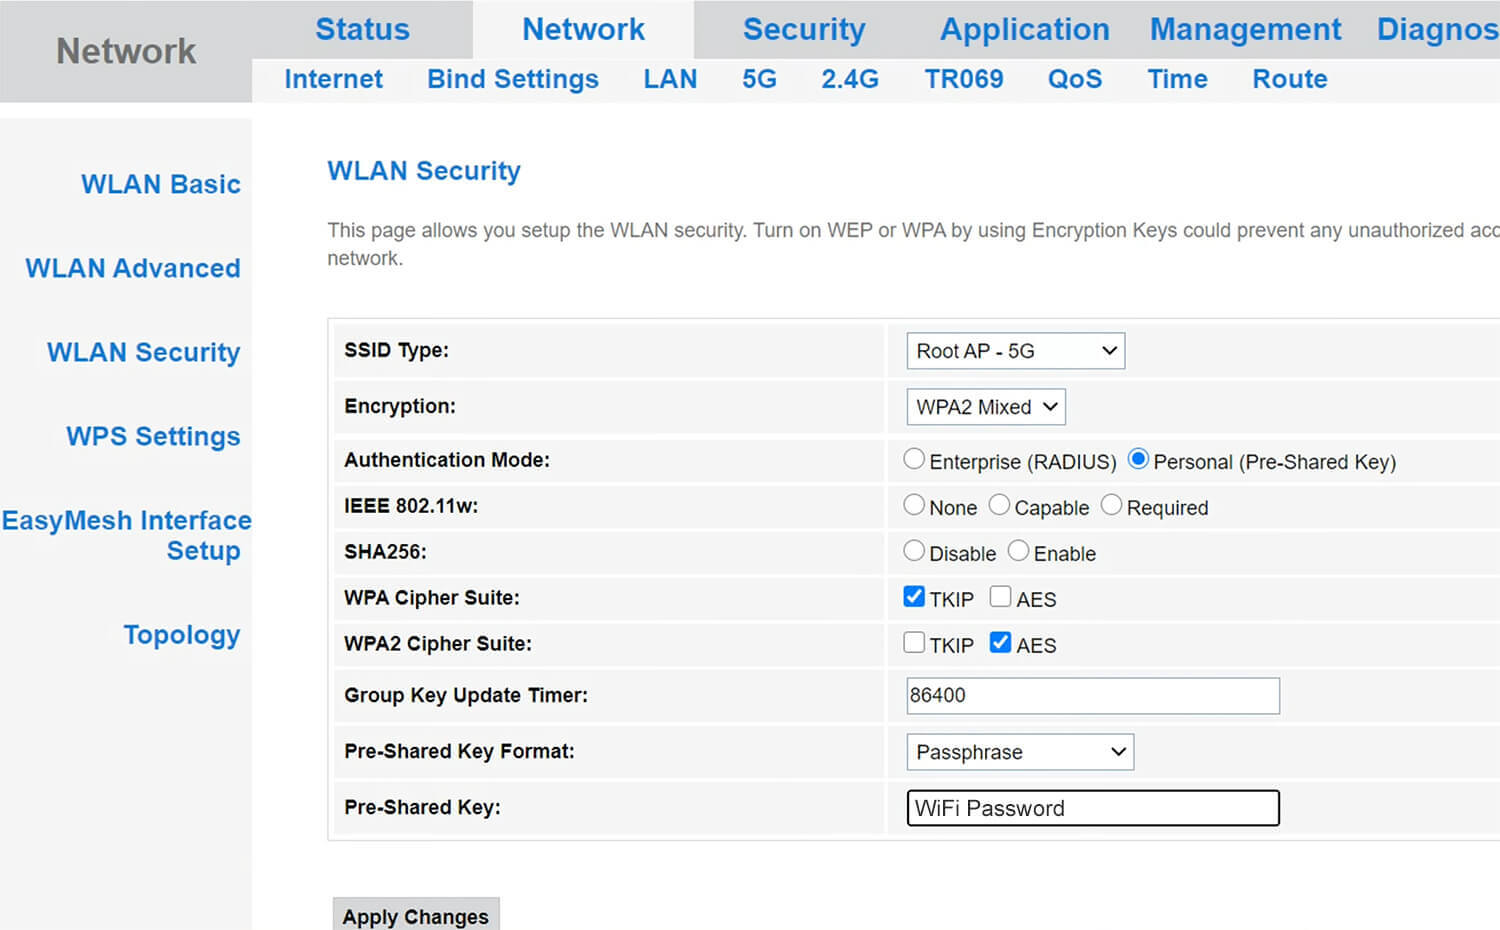
- Enter the Wi-Fi Password in the Pre-Shared Key field and click Apply Changes.
AS 344
- Open a browser and type http://192.168.1.1 in the address bar.
- Enter the Username: admin and Password: stdONU101 and click Login.
- Select Network > WLAN > SSID Settings.
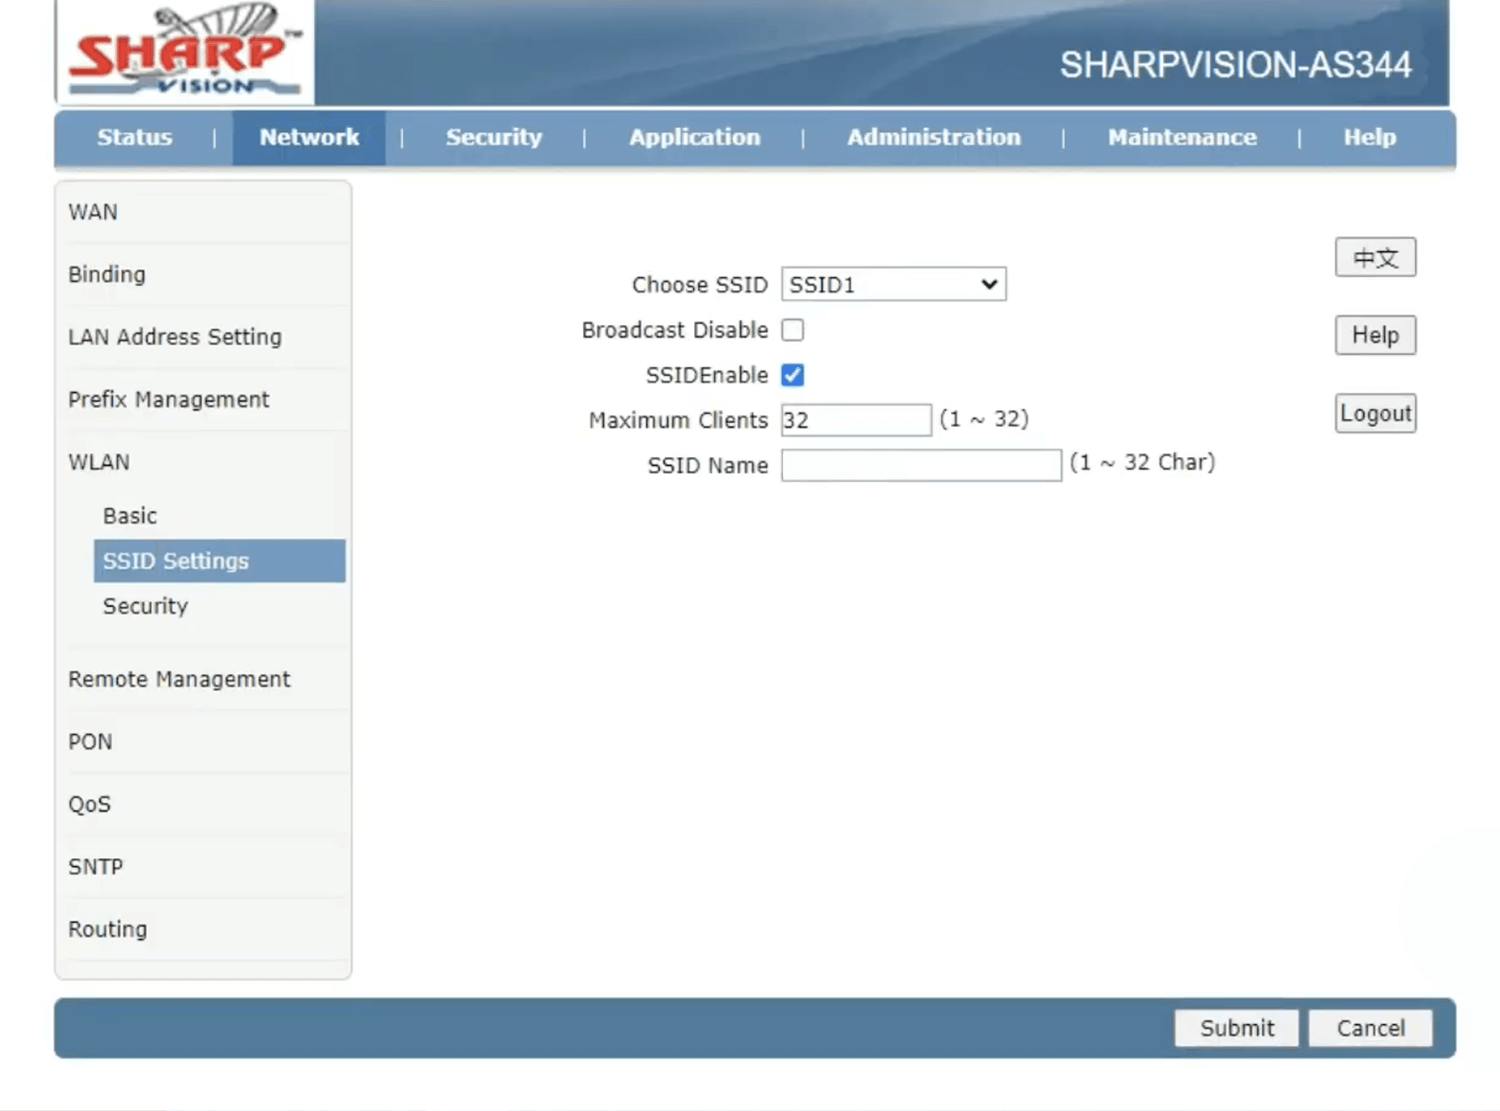
- Enter the Wi-Fi Network Name in the SSID Name field and click Submit.
- Select Network > WLAN > Security.
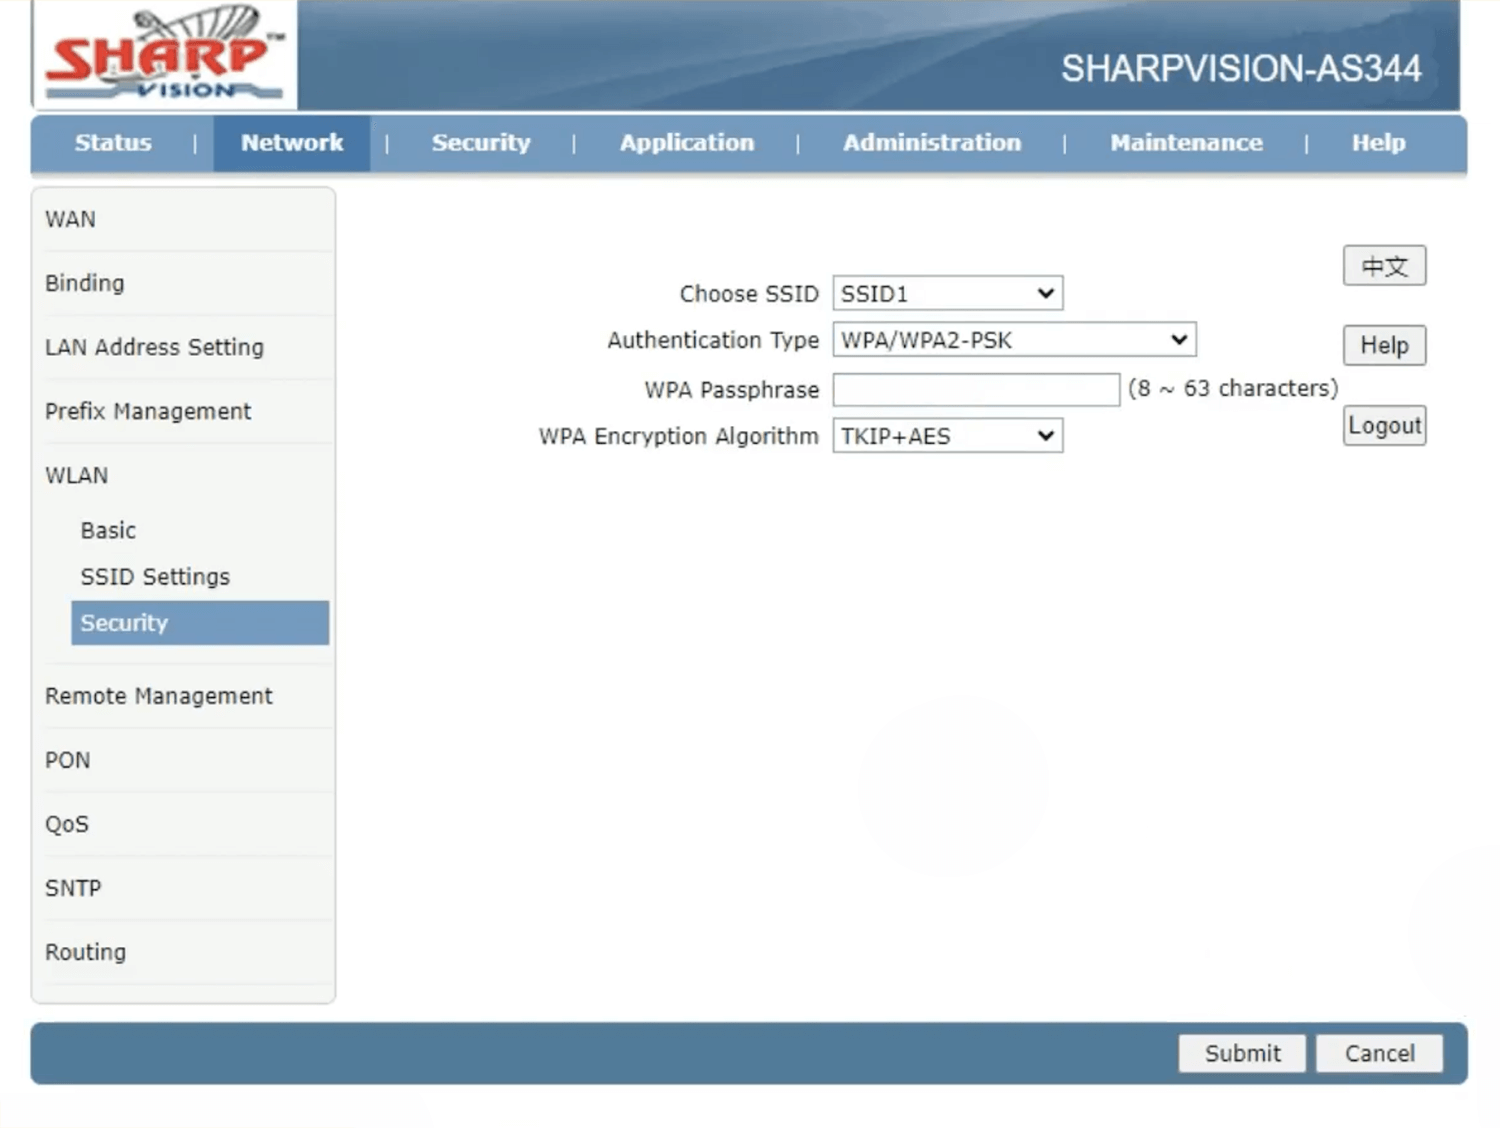
- Enter the Wi-Fi Password in the WPA Passphrase field and click Submit.
AS 354
- Open a browser and type http://192.168.1.1 in the address bar.
- Enter the UserName: admin and Password: stdONU101 and click Login.
- Select Net > WLAN.
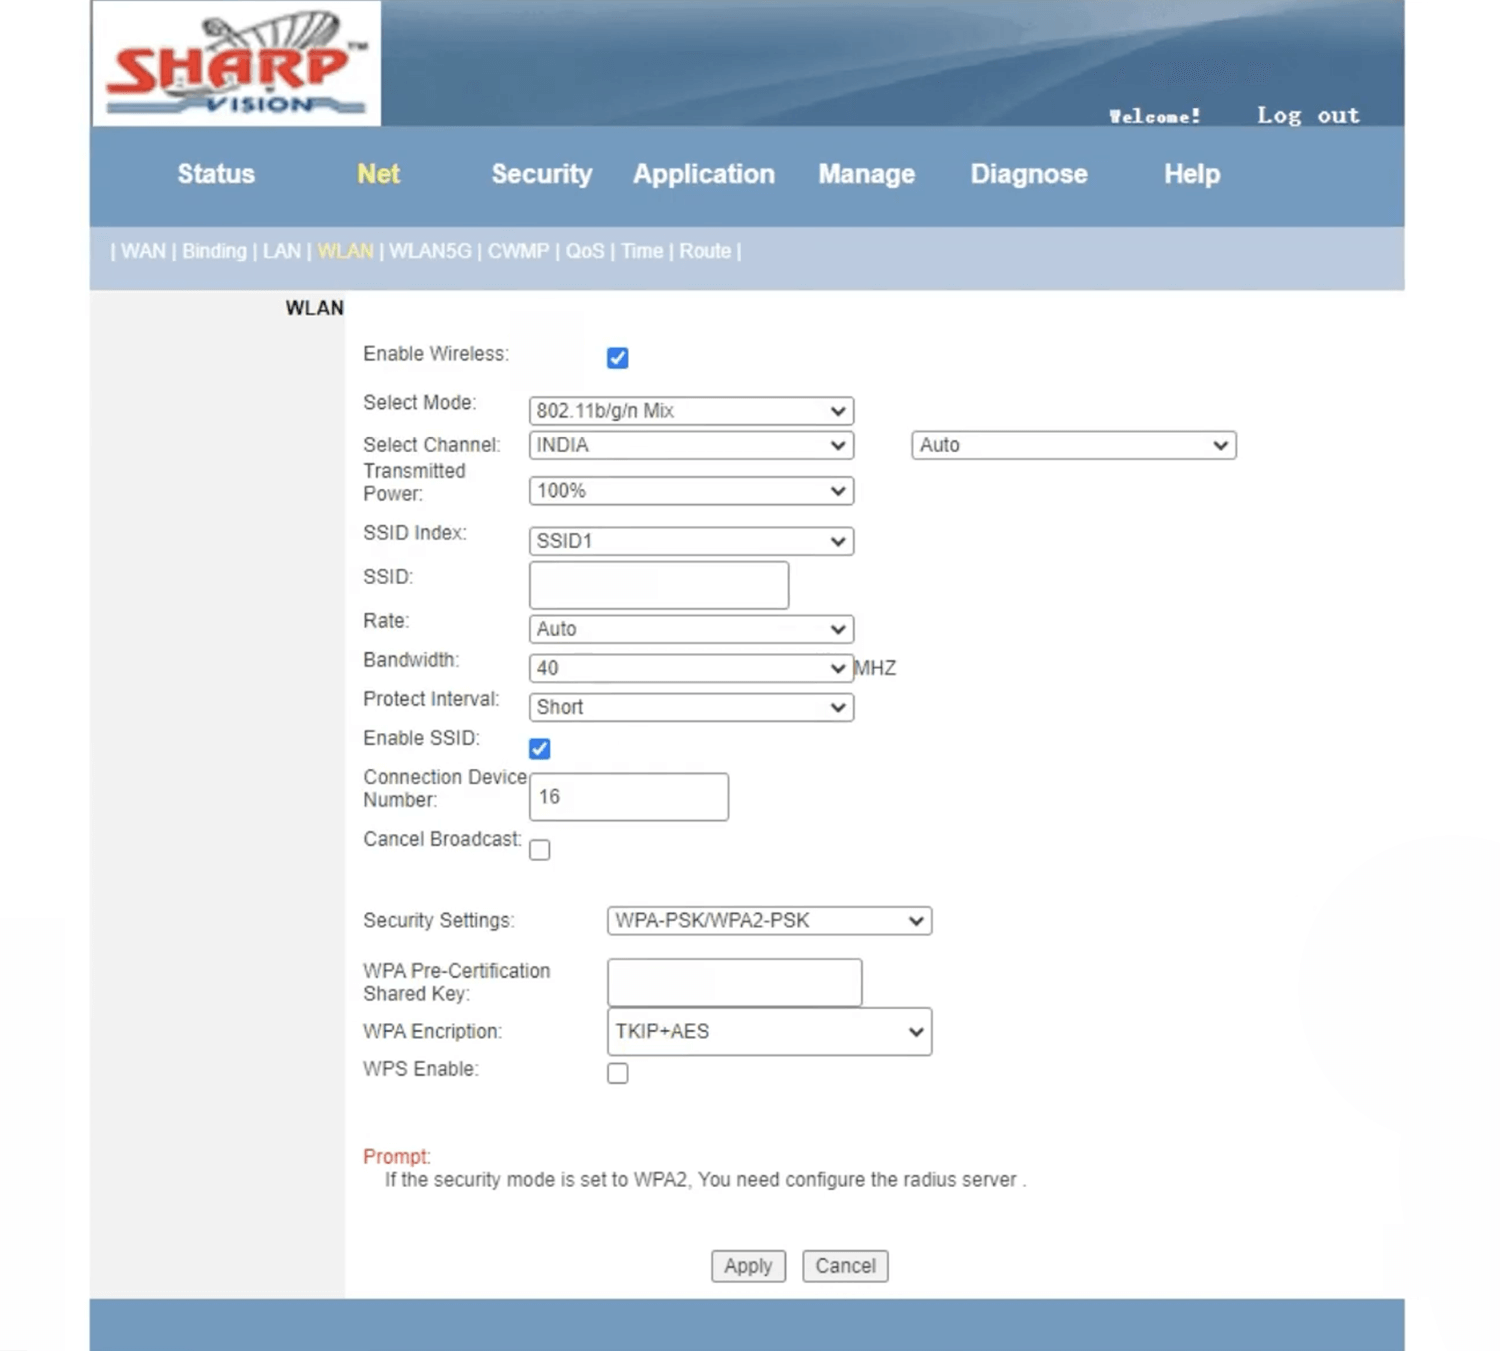
- Enter the Wi-Fi Network Name in the SSID field.
- Enter the Wi-Fi Password in the WPA Pre-Certification Shared Key field.
- Click Apply.
AS 321 / AS 341
- Open a browser and type http://192.168.1.1 in the address bar.
- Enter the Username: admin and Password: stdONU101 and click Login.
- Select WLAN > Basic Settings.
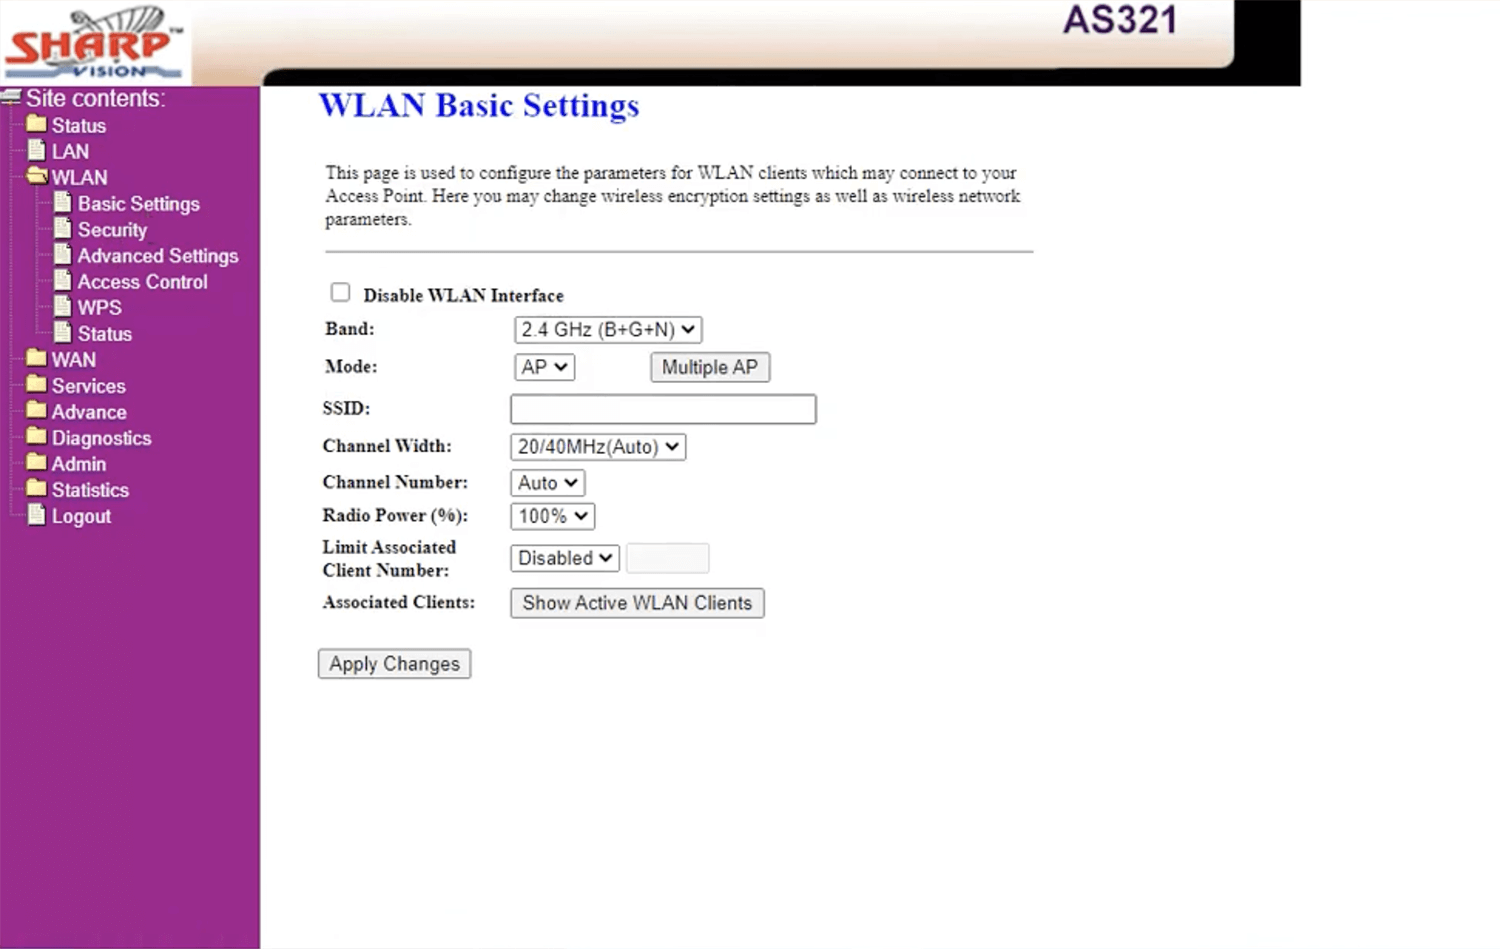
- Enter the Wi-Fi Network Name in the SSID field and click Apply Changes.
- Select WLAN > Security.
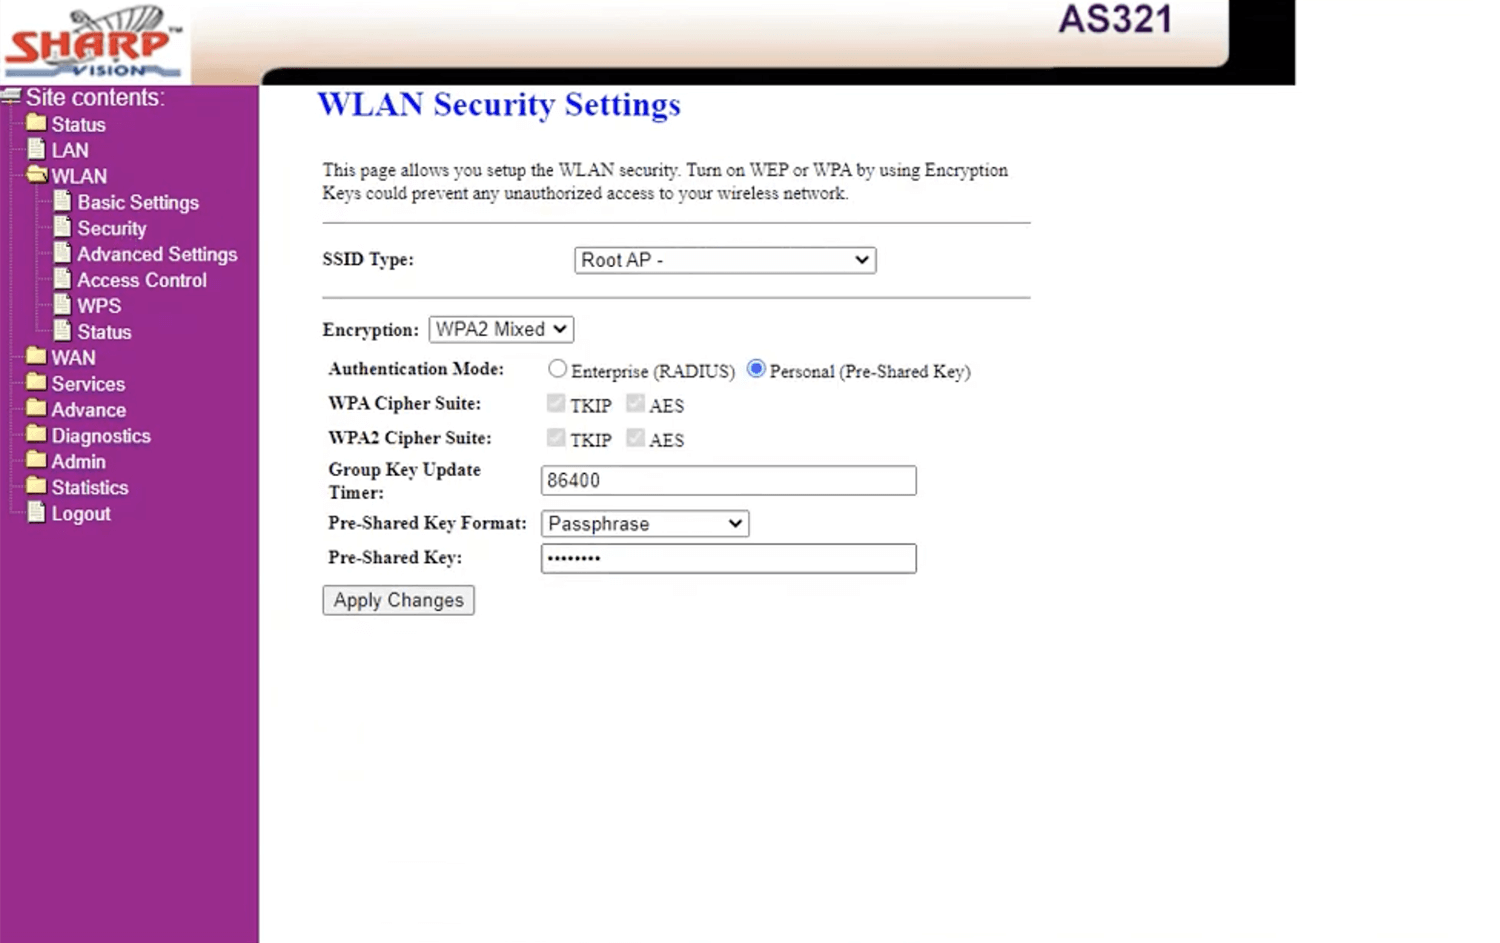
- Enter the Wi-Fi Password in the Pre-Shared Key field and click Apply Changes.
