
If there is any area in your house where the wireless coverage is weak then a range extender might be the best option instead of buying a new router. A range extender is not only a solid but also a lower-cost alternative to buying a new router. With the help of a WiFi Range Extender, you can easily amplify and boost the strength of your Wi-Fi signal and a range extender does so by receiving an already existing signal, amplifying it, and then transmitting the amplified signal.
There are different range extenders available but we will be discussing TP-Link Range Extenders. TP-Link Range Extenders do what they promise and setting up a TP-Link Range Extender is simple and here is how you can setup a TP-Link Extender: (Before you start, make sure that the router is powered on, setup, and working.)
- The first step is to plug your Range Extender into the power source and wait for it to turn it. Make sure that the Range Extender is close to the router during setup. (This can take a few minutes so, be patient)
- Once the Range Extender starts up and the lights become solid, connect your PC to the default network of the range extender. You can find the default SSID printed on a label at the back of the router. It is usually named “TP-Link_Extender“.
- Go to the Range Extender management page: http://tplinkrepeater.net/. You can only access this page if your PC is connected to the default network.

- You will be asked to create a login password for router management page. Enter a password as preferred.
- Once logged in, go to the Quick Setup tab.
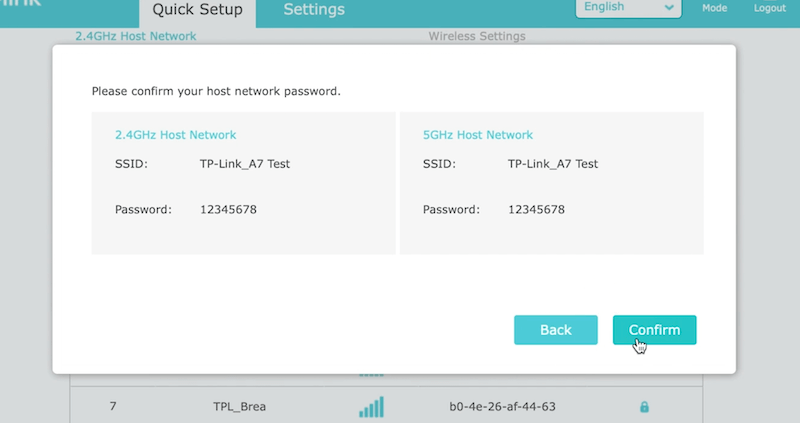
- Now, find the original Wi-Fi SSID, enter the Wi-Fi password, and connect Range Extender to Router’s Wi-Fi Network. If you have a dual-band router then you will have to do it twice, once for the 2.4 GHz band and the other for the 5 GHz band.

- Once you have entered the host network password, you will require to “Confirm“.
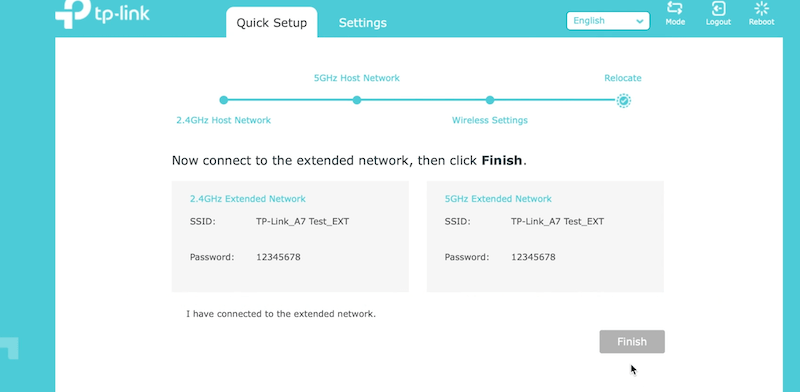
- You will now be asked to set the extended network settings i.e Extended Network SSID and Password.

- Connect your PC to the extended Wi-Fi network.
- Click on “I have connected to the extended network.” and then click on Finish.
Key factors to know when relocating your Range Extender:
After you have set up your TP-Link Range Extender, you will have to relocate your range extender. Here are some things to keep in mind when relocating the range extender:
- The Range Extender should be close to your router in order to get a strong signal.
- The Range Extender should be placed between the router and the area that needs service i.e where coverage is weak.
- If the signal light is green then it means that the position of the Range Extender is fine.
- If the signal light is red then it means that the signals are weak from the original router and you will need to move the Range Extender close to the router.